Tuesday, March 29, 2011

Pulling Into The Station - Quilting Stop

Hello Again! Since the Pulling Into the Station post about men, I thought of several other stops we could make that showcase quilts.

The first stop will leave you clucking for more. Please visit Cluck Cluck Sew.


Just look at this quilt. I love the red, green and blue in it. Wouldn't it be perfect for a little baby blanket?


Next we are getting a little taste of some sweet fabrics. Please visit the Moda Bake Shop.


Take a look at these quilts. I love the bright colors that were used.


The last stop on our route today is sweet like honey. Please visit The Purl Bee.


This wall hanging of trees is so wonderful with it's pop of green color.


Thanks for coming along on the stops today. Come around next week to see more amazing stops.

Thursday, March 24, 2011

Sundress Redo Part 2

I know ya'll have been waiting to see what else I did with the sundress so here is the second piece. Sorry about the picture quality. My regular photographer was working late so I had mini me take a picture from my Iphone. I am planning on coming back and replacing these pics. I just wanted to get something out on my blog.

For those of you who haven't seen the original pic of the sundress, here is a reminder:


Here is the after pic.


I actually started working on this part first, but I decided that I needed a different color of thread then what I had so I put it to the side for a little bit.

When I first tried the top part on I decided that the straps needed to be taken in somehow. So, my first thought was to rip the seem that was holding the straps to the dress and just make them ties for a halter top. When I went to do this, I found a wonderful surprise.


The straps were actually adjustable, and they had three button holes at the ends that then buttoned into the back of the top. So, I played around with it to get the right fit. I decided to criss-cross the straps in the back bringing up the top enough for my liking.


The next step for me was to make the front not so revealing. So, I sewed up the V in the front. You can see in the picture by my drawn lines exactly where I sewed. This shirt still seems quite revealing for me, but I think it might just work for a hot date with my hubby.

Tuesday, March 22, 2011

Pulling Into The Station - Mommy Stop

Confession: Since I am feeling guilty for yelling at my son for poopooing in his underwear for the millionth time, I thought I would share a few blogs about mommyhood. (Anybody have advice about potty training little boys?) All these ladies have children, and I love reading their blogs because I can relate to most of their post.

First, let's visit a place where the mommy is just plain 'mean'. Please go visit The Meanest Mommy.


Now let's visit a place where the kids are following very closely behind their mom. Please visit Following In My Shoes.


Lastly let's take a look at a supermom...well not exactly. Please visit Anti-Supermom.


Hope you enjoy visiting these stops and that you realize that you are not alone. Somewhere out there is another Mom who is going through the same daily struggles as you are.

Thursday, March 17, 2011

Sundress Redo Part 1

I know you have all just been dying to see what I come up with next so you don't have to wait any longer.

My coworker let me go shopping in some clothes that she was going to get rid of, and I found this little number. She had never even wore it, and the tag was still on the dress.


The fabric is very pretty, but it's a little much so I decided to split it into several pieces. The first one I am going to show you is this wonderful number.


All, I did was get my handy seem ripper out, and go to down seperating the bottom from the top portion. Once that was done, I measured my waist and cut the bottom to fit my waist. I sewed the side together, and put in an elastic waist. I still have plenty of fabric left to do something fun for little girl.

Thanks for stopping by.

Tuesday, March 15, 2011

Pulling Into The Station - Men Stop

I see I got your attention on that one. I am going to do things a little different this week. We are having the Pulling Into The Station before my craft post because, well, I need to finish something up first. As you may have guest from the title, I am featuring blogs that were created by guys today. I only have two blogs I am going to feature today, but if you have any more in your list of favorites please let me know.

First stop is a place where kids get to play with fun and whimsical trinkets made by their dad. Please visit Made By Joel.


Just look at this fun stackable flower toy made out of wood.


Our next stop is a place where fabric and thread fly. Please visit I'm Just a Guy Who Quilts.


Just look at this pattern he was recently working on. I would love to see the finished quilt.


Hope you enjoyed your Men Stops. Sorry I didn't have any real eye candy. Though, there was definitely some crafty eye candy.

Thursday, March 10, 2011

Pulling Into The Station - Wedding Stop

Ok! It's that time again. We need a littl pit stop. This week we will be stopping at some places that are simply gorgeous. I am not getting married. In fact, I have been married for a good little while. We are going on our 9th year. Pretty impressive if I do say so myself. I thought there might be a few of you out there who are tying the knot soon. Also, I like going to these sights for party inspiration. So, without further ado, let's make the first stop.

This first stop is simply divine. Have a look around, and stop at Divine Party Concepts.


Just look at this table setting that they showcased on their blog recently. I love the ribbons and all the shades of green.


Next stop is full of style and grace. Please visit With Style & Grace.


I thought this idea looked fun. Take a look at this rice krispie treat bar. Each guest had several choices to dress up their rice krispie treat.


Last on our stop today is a place full of wedding inspiration. Please visit Luna & Chloe's Weddings.


Just look at these invitations and save the date cards that they featured on their blog.


Hope you enjoyed the stops today.

Tuesday, March 8, 2011

You Color My World

Sorry for the cheesy title. I'm not very good at coming up with catchy titles. This tutorial is a long time coming. I took these pictures back in January.

Today I am going to show you how to make the shaped crayons that are so popular right now.

All you need are some broken crayons, a mold of some sort and a stove. I guess the stove goes without saying.


To get started, break up your crayons into small enough pieces to fit in the molds. Then, start filling your molds. I stuck to putting the same color crayons together, but you can put different colors together to have a rainbow affect.


My mold is actually an ice mold from the Dollar Spot at Target. They came 2 to a package, and they were only $2.50. That is why there is foil lining my cookie tray. I wasn't sure how well the ice trays would hold up. I put the trays in the oven at 275 for about 10 minutes. Just keep an eye on your crayons. You can tell when they are ready to come out of the oven when they all appear to be in a liquid state. After I took them out of the oven, I placed them in the fridge to harden faster.


I got inpatient and jacked my temp up just a little. It started warping the ice cube tray. So, if you are using ice trays stick to the lower temp and take your time. I bet the Dollar Spot has trays for St. Patty's day and Easter now. Why don't you go take a look?

Thursday, March 3, 2011

Pulling Into The Station - Meal Stop

You know that saying, you shouldn't shop for groceries when you're hungary; well, I guess you shouldn't create a blog post when you're hungary either.

First off let's visit a place where you can still get skinny and eat good food. Please go to Gina's Skinny Recipes.


Look at the yummy french fries she recently posted. It's hard to believe that they were baked. She even post how many weight watcher's points are in each recipe.


Second, let's go to a place where the food has a delicious homemade taste. Please visit Hoosier Homemade.


Check out this bowl of loaded bake potato soup she recently posted. She also features segments called Cupcake Tuesday, Baking, Cooking & Decorating to name a few.


On our last stop, we are going to a place that is simply good eats. Please visit Annie's Eats.


Check out these crispy chicken tenders. This is definitely something my kids would like...if I ever cooked.


Hope you enjoyed this stop along the way.

Tuesday, March 1, 2011

'Wunder'ful Onesies

Ok! So, that was a little bit of a stretch, but I couldn't resist.

One of my friends had a baby shower over the weekend. So, I decided to make some onesies for her. One is really girly, and the other one is for the baby is throwing those midnight parties. Mom's you know what I am talking about. I even have step-by-step pictures to go along with the tutorial for the girly one this time. Shocking, I know!

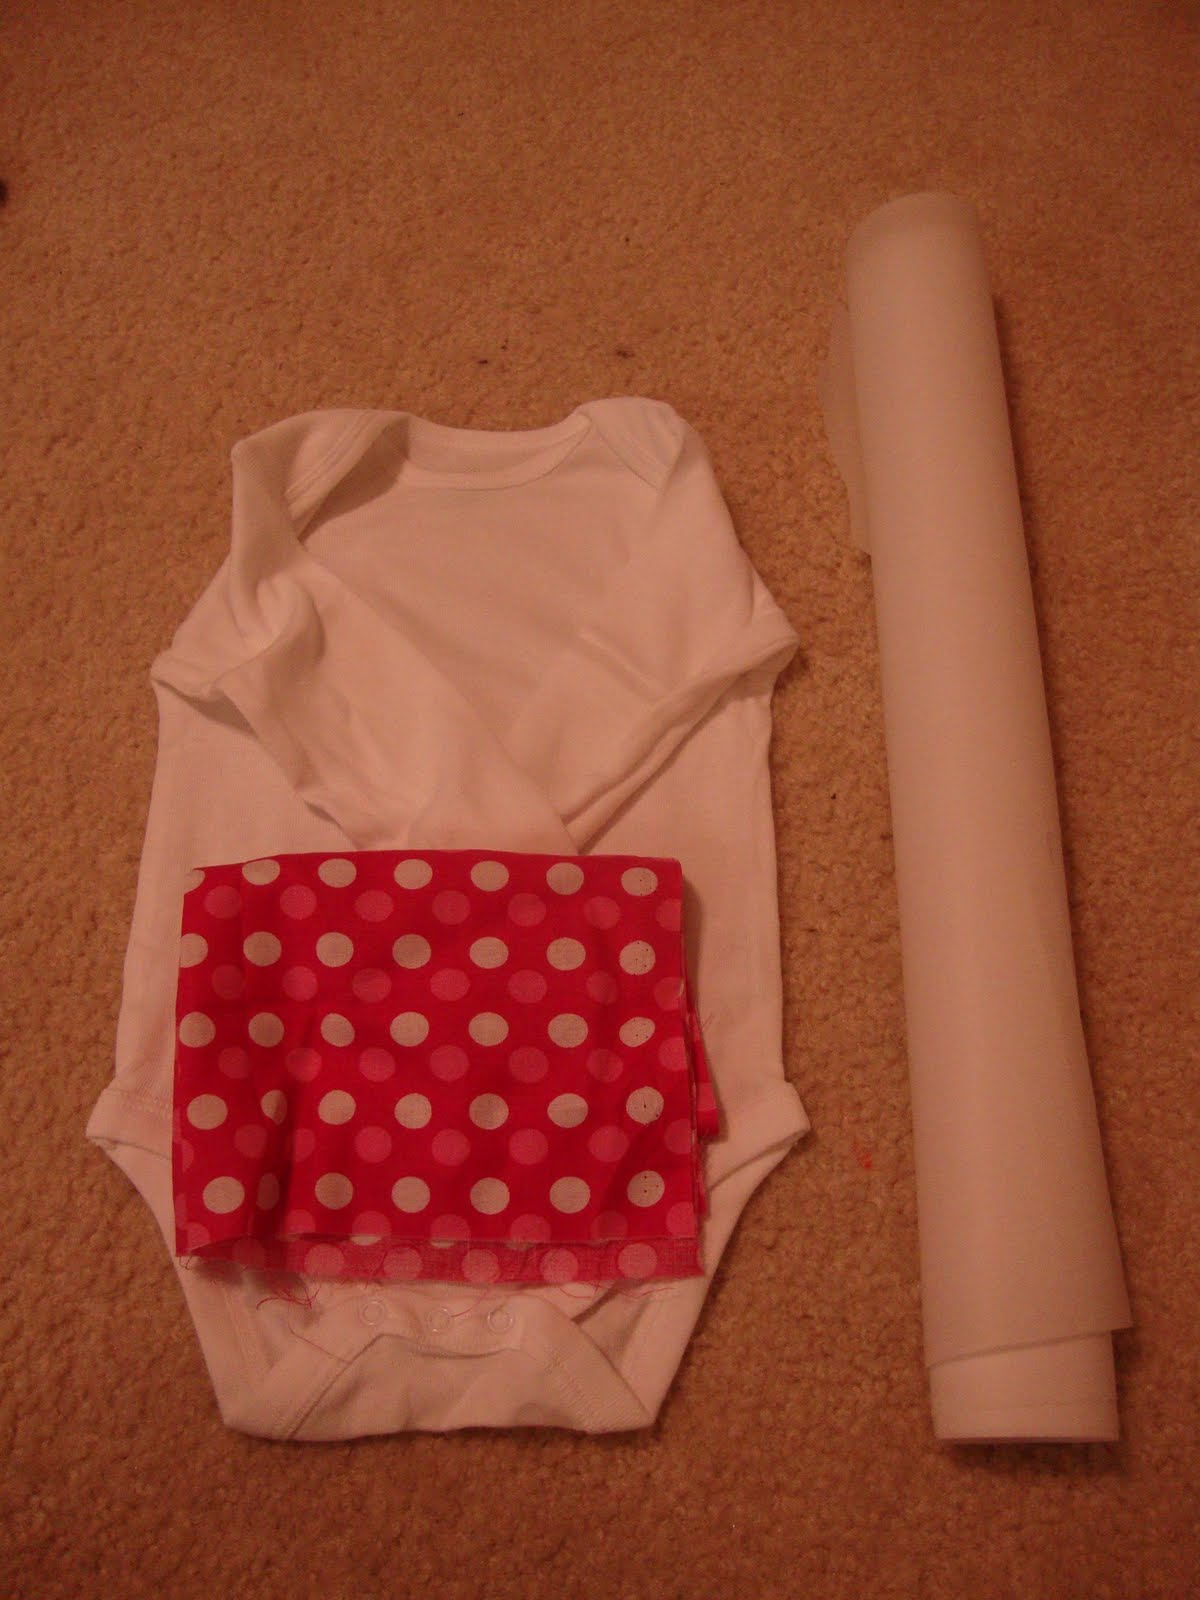
Supplies you will need: Onesie, fabric and Wunder Under.


For my pattern, I went into Word and picked a font I liked. Once I printed it out, I cut it out.


I placed it on the Wunder Under backwards, and traced around it.


I then cut it out.


Iron this onto your fabric piece on the wrong side. Then, cut it out.


Peel off the paper backing, and put it on the onesie where you want it to go. Then, iron it on.


This is what it looks like at this stage. You can leave it like this, or you can do what I did. I took some coordinating embroidery thread and hand-stitched around my pattern. This just gives it a little more staying power. If you look closely in the last picture you can see that I outlined my A in purple thread.


For, a cute little touch I added a heart to the bum.


Now for my rocker onesie. What is funny about this is I told my friend before she opened my present that one onesie was kinda joke, and that if she didn't want to put it on her little girl she didn't have to. When, I told her that she proceeded to say that her husband had been looking at onesies online that had the exact same thing on them as my second onesie.


I just made a design in Word, and reversed it. Then, I printed it out on an iron-on transfer sheet. I found mine at Target. This is really easy to do. The only reason I had to reverse mine is because it had wording on it. If it's just an image, it doesn't really matter.


Hope you enjoyed my little tutorial.