Showing posts with label Sewing. Show all posts

Tuesday, September 27, 2011

One Little Indian Girl

This week is Homecoming here in our small town. So, the school is having themes each day. Today was Cowboy and Indian Day. So, I dressed my daughter as an Indian and sent her to school. If you wait to the last minute to come up with something don't sweat it. A costume can sometimes be pulled off in a matter of minutes. I had an XL brown shirt that I was planning on using to make an altered shirt. I just didn't know what I was going to do to with it.
We had a Pochahontas outfit that I had made her last year that still fit, but I didn't think the school would like it too much if I sent A in it because it is just a one shoulder dress. So, I had to come up with something else. I took the brown shirt and put it on her to see how much I needed to take it in. I turned it wrong side out to sew it. This was a mistake because I was going to make fringe out of the left over fabric on the outer edges. When I turned it back the right way, all my fringe fabric was on the inside. So rather than use the seem ripper and take out what I just sewed, I just cut the tag off the back. I cut off the bottom of the t-shirt and the original sleeves so unless you really get to looking you never would know that it's on wrong. Also, the handband is part of the original sleeve. I just cut part of it off, and it's already sewed in a loop so you don't have to sew it of tie it in any way.
Hope this gives you a quick idea for a costume. It would be perfect for Halloween since it's just around the corner.

Saturday, July 16, 2011

New Name Shirt

Just wanted to add my latest name shirt. This one is purple and white. If you would like to make one of your own go here to my previous post where I created my first shirt.


Wednesday, June 8, 2011

Reverse Applique Shirt

I made this cute shirt for my nephews birthday. I think it turned out rather cute for the first time that I have done reverse applique.


I bought a shirt on sale at Michael's, and then I found a t-shirt that my husband never wore to use as the red part. This is definitely a great way to use those promotional shirts you sometimes get.


I printed out my name, and then traced it onto tissue paper. I pinned the red to the inside of the shirt, and then pinned the name to the front. I then took my time sewing around each letter. After that, I cut the access red fabric away on the inside of the shirt. Then, I picked the tissue paper that was left out of the design. When all was done, I took a pair of sharp scissors and carefully cut away the blue shirt to reveal the red underneath. The design and color possibilities are endless.

I like the red and blue so much that I am thinking about making USA shirts for July 4th. I have also thought about selling these. If anybody is interested in a shirt, let me know.

One of the commenters posed a good question. Will the edges of the cut shirt fray any? It depends on which type of fabric it is. I think with the knits it might roll up a little but not fray With other fabrics, it would fray a little.

Tuesday, May 24, 2011

Cute as A Cupcake

Today happens to be my niece's birthday. She had a party this weekend so I decided to make her something special for the day. I made her a skirt with a matching shirt.


I got out some of Audrey's skirts to get an idea of how I would like to design my skirt. Then, I went to town. I decided I wanted a skirt that had a flat waist band in the front with elastic in the back. I just kind of winged my pattern. I got this fun fabric at Wal-Mart from the clearance bin. I made one skirt, and let Audrey try it on, and it was too big for my niece. So, I made another one. I don't know if it fits her, but it was smaller than my first attempt.


I decided that I needed a fun shirt to go along with my skirt. So, I did a search on the internet for cupcake images. I then took that image made an outline that I could use with my silhouette. This is my first project with my silhouette, and I am happy with how it turned out. I appliqued the fabric onto my shirt, and sewed around it to give it more staying power. I love how the fabric mimics the lines on a cupcake wrapper. I also decided to add a little bling for sprinkles on the top of the cupcake because what little girl doesn't love bling.

I hope she enjoys her outfit, and I plan to make a lot more in the future.

Tuesday, March 1, 2011

'Wunder'ful Onesies

Ok! So, that was a little bit of a stretch, but I couldn't resist.

One of my friends had a baby shower over the weekend. So, I decided to make some onesies for her. One is really girly, and the other one is for the baby is throwing those midnight parties. Mom's you know what I am talking about. I even have step-by-step pictures to go along with the tutorial for the girly one this time. Shocking, I know!

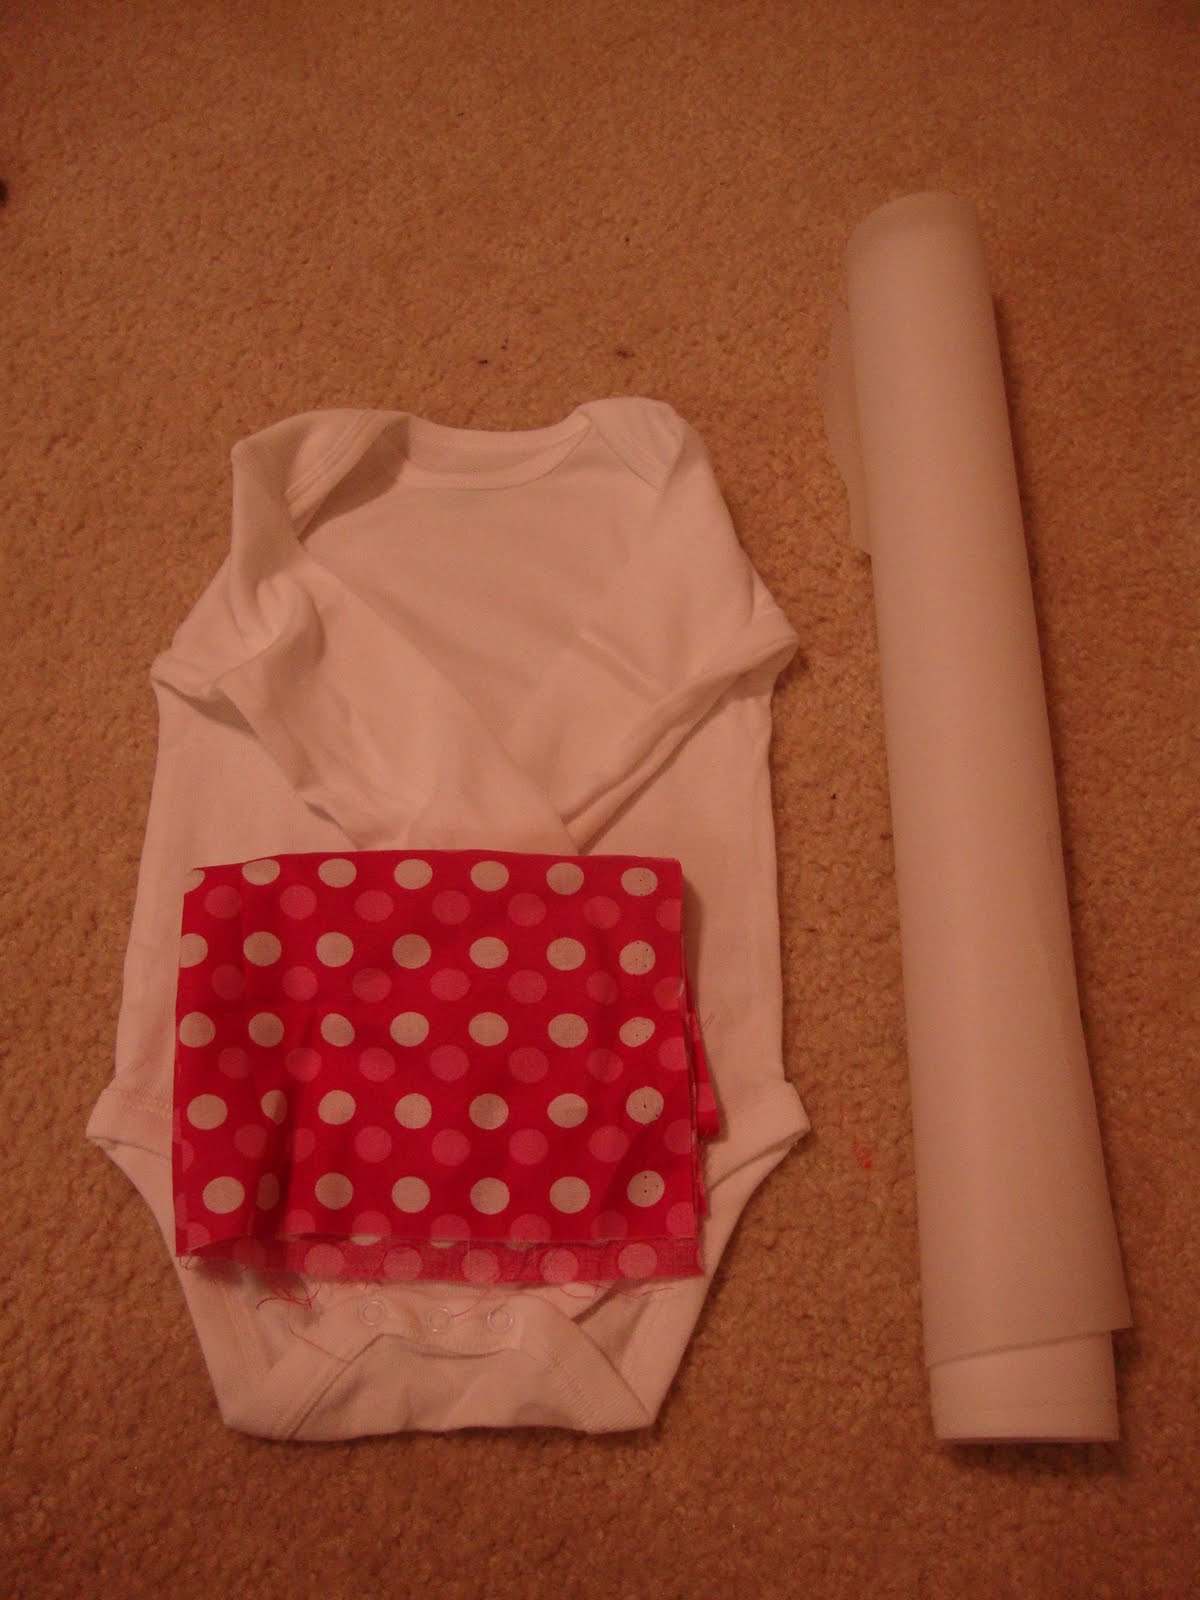
Supplies you will need: Onesie, fabric and Wunder Under.


For my pattern, I went into Word and picked a font I liked. Once I printed it out, I cut it out.


I placed it on the Wunder Under backwards, and traced around it.


I then cut it out.


Iron this onto your fabric piece on the wrong side. Then, cut it out.


Peel off the paper backing, and put it on the onesie where you want it to go. Then, iron it on.


This is what it looks like at this stage. You can leave it like this, or you can do what I did. I took some coordinating embroidery thread and hand-stitched around my pattern. This just gives it a little more staying power. If you look closely in the last picture you can see that I outlined my A in purple thread.


For, a cute little touch I added a heart to the bum.


Now for my rocker onesie. What is funny about this is I told my friend before she opened my present that one onesie was kinda joke, and that if she didn't want to put it on her little girl she didn't have to. When, I told her that she proceeded to say that her husband had been looking at onesies online that had the exact same thing on them as my second onesie.


I just made a design in Word, and reversed it. Then, I printed it out on an iron-on transfer sheet. I found mine at Target. This is really easy to do. The only reason I had to reverse mine is because it had wording on it. If it's just an image, it doesn't really matter.


Hope you enjoyed my little tutorial.

Tuesday, February 22, 2011

Party Wrap Up

I am just going to make a really long post for the rest of the things I did for the party.


First off the cute toppers for the cupcakes. I did a search online for images for Tangled. I found some tattoo images that had 6 different images in them. I then did a Print Screen of my IE window, and pasted it in Word. From there I cropped out everything that wasn't my images. I then adjusted the size of the image to what I wanted. I made the images about 1 1/2 inches. Once those were printed out, I traced circles around my images and cut them out. I then cut out pink circles that were slightly bigger than the Tangled image. I used glue dots to glue those to sucker sticks, and then stuck them into my cupcakes. My cupcakes weren't anything fancy. They were made out of a cake mix and store bought icing.


Next, I made sugar cookies and iced them. I used Betty Crocker sugar cookie mix. I then made some royal icing and dyed it pink. Once, the icing was hardened, hubby and I drew towers on the cookies with food color markers.


I then made a banner for the wall. For this, I cut out circles from tissue paper, and then sewed them together with my sewing machine. I added some scrapbooking stickers to spell out baby girl's name.


For a game, I used rope. Just what type of game can you play with rope? I thought of tying the kids up, and 'untangling' them, but I didn't figure the parents would like it too much if I tied up their kids. (Just Kidding! This thought never crossed my mind.) What I did was cut two pieces of rope. I put knots into the rope, and each child on the team had to undo a knot until Repunzel's hair was 'untangled'. Since, the party was primarily younger kids, I didn't make my knots very tight. This was a fun activity for about 5 minutes. I really needed to come up with a few more things to do.

Hope I gave you several ideas that you can use for your next party.

Tuesday, February 8, 2011

Hooked on You

For my mom's birthday, I decided to make her something to hold her crochet hooks. I got the perfect tutorial over at Little Birdie Secrets.


The inside has a section that holds your crochet hooks, scissors and small needles. On the section that holds your hooks, you sew lines across the section sewing the lines closer to each other as you go across the sections. This ensures that the needles stay snug in the pockets.


The outside has your button or clasp of some sort on it.


I followed the tutorial for the most part, but I didn't have any thin hair elastics. Also, last week we had awful weather in the part of Texas that I am in. So, I decided to make a loop made out of the fabric that I used to make the main part of the case. It worked just fine. Just goes to show that you don't have to follow a tutorial exactly.

For my fabric loop, I cut a long narrow strip of fabric. I then ironed in the two long sides and folded it in half and ironed it again. Then I sewed down the open side to keep it closed. You will put the loop in when you put your two sides together with the fronts facing each other. When you pin in your loop, the ends need to be sticking out. i just wanted to make that clear since in the picture on Little Birdie Secrets, it looks like the loop is sticking out.


Deets~Fabric is from Wal-Mart, thread is from Joann's and the button is one I found in my mom's stash a long time ago.

Tuesday, January 25, 2011

I need A Hero

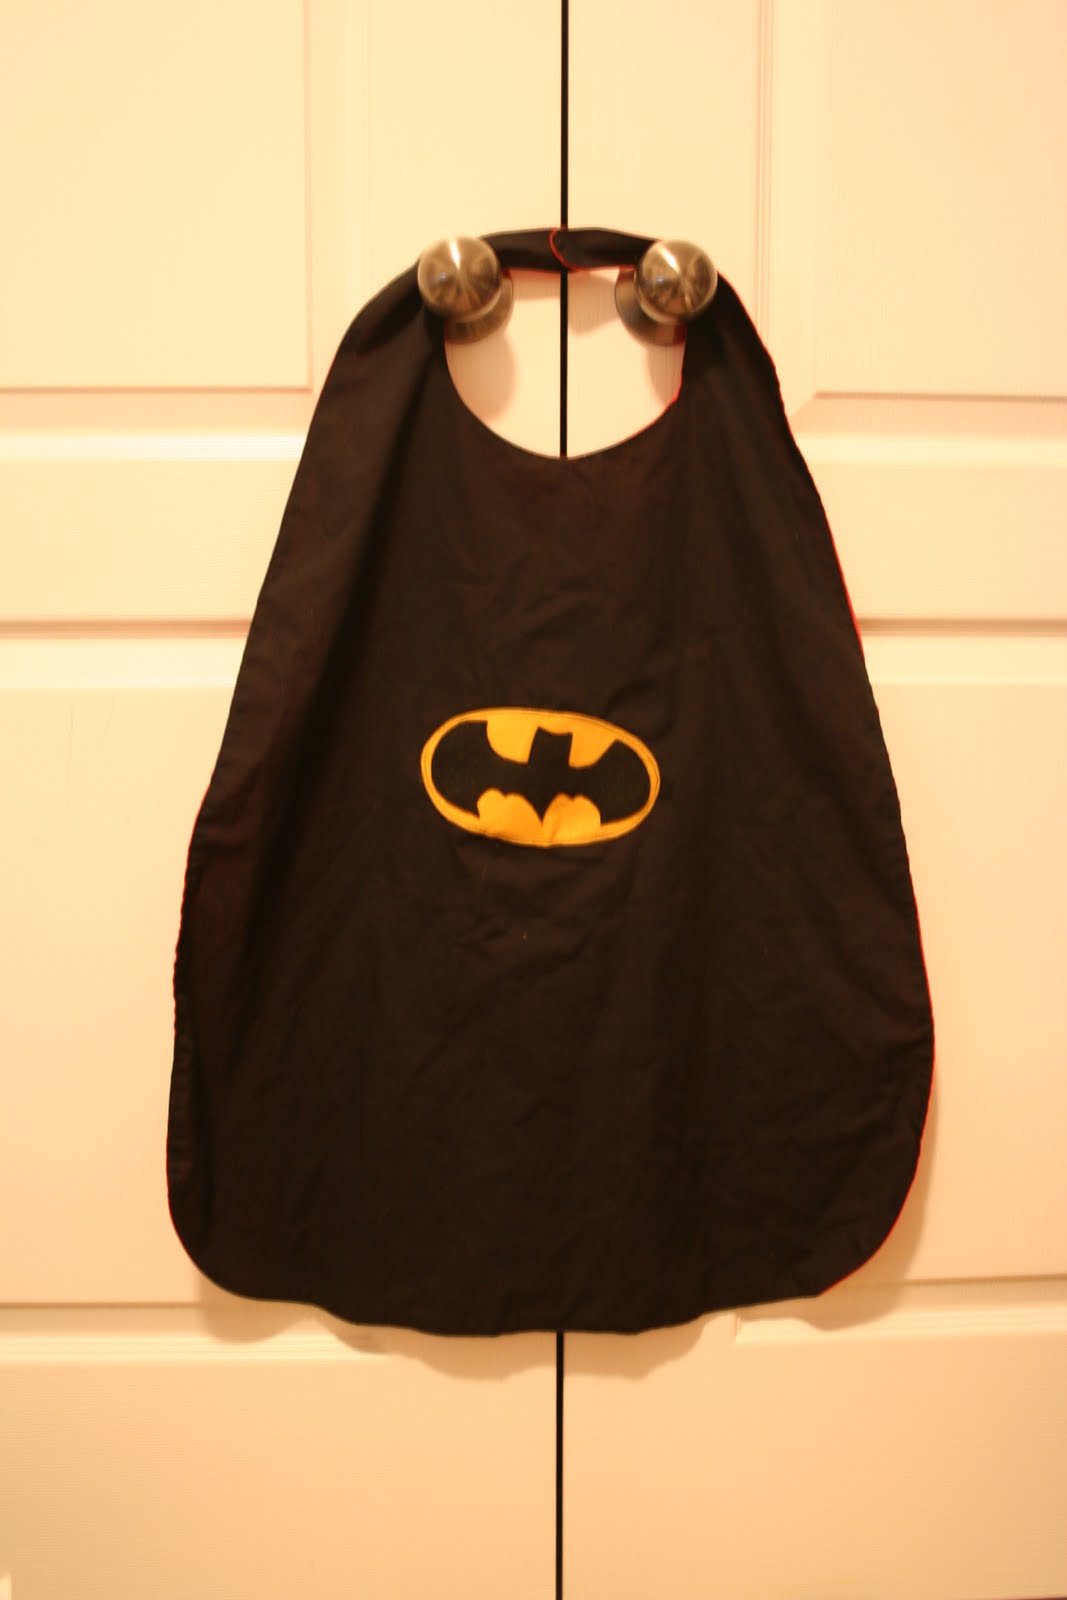
I promised a long time ago that I would post some better pictures of the cape I made for baby boy's birthday back in November. Well, I am finally getting around to posting them. Sorry for the delay. This was super easy to make. Anybody with beginning sewing skills can make one of these.

There is one side batman.


And the other side superman.


I used the pattern over at Serving Pink Lemonade for the emblems.


Deets~I bought a yard of each color, but I had plenty left over for other projects. That's where the red and black came from in the car tote. First, I measure my little boy from shoulder to back of knee to get the length. One thing that I wish I would have done was measure his neck. I got the neck a little too big on my cape. To fix this issue I will probably go back and add some extra velcro. To cut out the symmetrical pattern, I folded the fabric in half, and then drew a cape on my fabric. I cut that out and used that as my pattern on the next piece. After I cut the felt pieces out for the emblems, I Wunder Undered them on the cape. I then hand-sewed around the felt to give it a little more staying power. I sewed the pieces together with the emblems facing each other with a gap at the bottom so I could flip it inside out. I then did a base stitch all the way around the cape. After I was done with that I added velcro to the collar pieces. You can make these in any color you want. My little girl has one as well that Nana made after she saw this original one I made.

Hope you enjoy the tutorial.

Friday, January 21, 2011

Out For a Sunday Drive

Sorry this post is a little late this week. I am going to try to start having craft post on Tuesdays and the Pulling Into The Station post on Thursdays. I made this car tote for baby boy for Christmas. We have tested it out once at church. He really didn't use the road side at all. He was more interested in running the cars into the back wall since we were on the back row. Oh, well! Maybe he will use the road sometime.


I don't have measurements I just eyeballed it. I wish I would have made it a little taller so there was more road space and I would have probably added another row of cars, but this was my first attempt at anything like this.


I decided to put his name on the outside so that we might be able to keep up with it. I just wonder undered some felt letters on the side. I need to go back and iron them on better or even stitch over them so they don't come off. I just used fabric and felt that I had in my stash. I am thinking about doing a tote for baby girl's little Polly Pockets and Disney Princesses. These are perfect for car trips or keeping your kids occupied in church, or at least they are supposed to be.


Deets~First off I knew that I wanted to make it 5 cars across so I took 5 cars and laid them out across the fabric, and then cut the fabric that width. I cut out two rectangles the same size for the front and insides. I then cut the green fabric. i ironed down the two sides of fabric, and then sewed them onto the black with lines for pockets. I made it where the openings of the pockets would be at the top that way when he's carrying it they won't fall out. I wonder undered the street lines and bushes on, and then I sewed the water on. These were all made out of felt. I made handles by cutting four strips of fabric. I sewed them wrong sides together and then pulled them out to the right side. I then wonder undered the name on the outside of the tote. I sewed the two right sides together on the long ends. Then, I flipped the tote inside out. I ironed down the edges on the short side, and I pinned the handles in. I then did a top-stitch over the short sides and over the handles. It was then done.

I think I got my idea from over at Homemade By Jill.

Monday, December 27, 2010

Ornaments atop a tree

Santa made the kiddos ornaments this year. Normally the kiddos get ornaments in their stockings, but I think the elves have made them in the past. This year I think the big man himself, or at least Mrs. Claus, made the ornaments.


They look to be made out of felt, Wunder Under, batting and thread. I found a tutorial I bet Santa used over at the Made blog.

Wednesday, July 21, 2010

Oh, Baby!

Welcome!

I have two cards to share with you today.

This first card was for a special order since I hadn't created any girl baby cards yet. I whipped out my sewing machine and some quilt batting and made a mini baby blanket. I think it turned out rather cute for my first card using my sewing machine.


~Deets~ Card base - Wal-Mart pack, patterned paper, buttons & stickers - Michael's

The second card is is also one I have in my stash to sell. I used a layout from one of my magazines, and came up with this.


~Deets~ Card base - Wal-Mart pack, patterned paper - Michael's paper pack, baby stamp, ink & brads - CTMH